
Using Photo paper and dye ink to make watercolor backgrounds.

This is a project I did with a group of 6-11 year old children at a Church daycamp this year. The kids loved making these cards. I cut and prepped everything for them in advance but, even without me to do that for you, you can make these cards quickly and easily. The only hard part is stopping with just a few backgrounds! Making these can be a bit addictive. Ready to start?
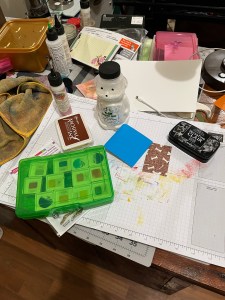
You only need a few supplies for these cards:
- White card stock, I used Neenah Solar White 80 #
- Black card stock, I used Stampin’ Up Basic Black
- Photo paper, I used HP Glossy
- Dye inks in various colors, I used Stampin’ Up
- Sentiment Die with a shadow layer
- Adhesive of your choice. I used Bearly Art Glue and Stampin’ Dimensionals
- Spray Bottle with water
- Glass plate or other glass surface

My photo paper was 4 x 6 inches so I cut in half along the 6 inch side to make 2 cards from each piece. I tapped multiple colors of ink on my glass plate and sprayed it with water, the more water you use, the lighter your ink will be. Then I put my 3 x 4 inch piece of photo paper shiny side down in the ink and kept it there for 5-10 seconds, rubbing my fingers across it to press it into the ink.

I wanted more color on this one so I added more blue ink and water to the ink left on my plate and placed the photo paper in it again.


Once I had my backgrounds made, I set them aside to dry while I made the sentiments. I cut the shadow from black and the sentiment from white and glued them together. Because the shadow is black, the ink from the next step will not show. (If you choose to use a different color for your shadow, you may want to ink before assembling to sentiment.)

I used the same ink colors on the sentiments that I used on the backgrounds. I rubbed the ink cubes directly on the card stock to color my sentiments but you could also apply ink with a blender brush or foam applicator.

Next I added adhesive foam to the back of my sentiments and assembled the cards, starting with the mat layer on the card base and the watercolor layer on top then finished with the die cut to make sure nothing was hanging over the edges of the card.


And just like that, my cards are done! I hope you will make some of these fun and easy cards.
These are also a lot of fun to make with Distress Oxide inks. I didn’t use those for daycamp because they take quite a long time to dry with this technique. If you do use Distress Oxides, then you follow the same steps but after they dry they will be coated with powdery oxidation. Just buff that off with a soft cloth and you will have a gorgeous, glossy background!
Leave a Reply to Brilliant Butterfly – The Quiet CrafterCancel reply